Ok... Here goes attempt 2 at this post. I wrote this all up and scheduled it to post on Friday, and blogger kindly at it on me. Needless to say, I was a little bit grumpy with it, so I have left it until now :)
Let's hope it posts better this time.
Little rosettes are a huge trend at the moment, but are so simple, quick and cheap to make yourself, that it seems a bit wasteful to spend your hard earned craft cash on premade ones that don't *quite* match your project. Here's a little tutorial on how to make your own rosettes with some leftovers from your stash!

First of all, cut a 1 1/2 inch wide strip of your desired colour, and score at 1/4 inch intervals. If you're making multiple rosettes, score the whole page first, and then cut into 1 1/2 inch strips.
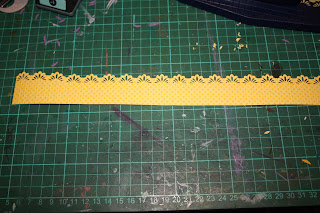
If you desire, use a border punch to punch the edge of your page. Completely optional, and if you don't have a border punch, you can always dig out those fancy edging scissors that were all the rage a few years back.
Looks pretty, especially compared to my feral (much loved and well used) craft mat...
Concertina fold your strip...
Then glue the ends together to make a circle. I like to use Helmar Professional Acid Free glue - it's nice to work with, and is quite quick drying, which is important when you're impatient like me :)
Punch 2 circles from some co-ordinating paper (or the same, if you like!). You can use a button or whatever you fancy here, but it's easiest to use a paper circle for the back one, at least. Smear them with glue...
Then line up your circle, and gather the straight edge into the centre. Pop it over a gluey dot, and press down firmly for a few seconds to let the glue grab.
Slip the other gluey dot onto the top of the rosette, hold for a few seconds and then you're done!
Don't mind the blurry photo here, but I decided to glue the rosettes to a stick, to make a fun bouquet for the local show display. They alos look great strung up on twine, fishing line or ribbon, as well as just used on a page or card as a cute little embellishment. When they're finished, the rosettes are about 3" across, so you can adjust the size down as you like. If you'd like to make them bigger, you'll need to use 2 strips of paper, joined together after you concertina the strips.
Now... lets hope blogger doesn't eat this post, or I might well give up in disgust!
Hope you had a great weekend!
x Rita


9 comments:
Wow , one of the cutest paper flowers I've seen!!!!
Hi Rita.... I thought I would come visiting, cute flowers, my little one would love these. I do think we need to start up an Aussie design blogger group if there isn't one already. How's the weather up there...freezing in Sydney!
Thanks for the tutorial, very nice paper rosettes! I will probably attempt those for my little girls's birthday but I need one of your cutters, it made a stunning edge design! Hope you are well!
Hi everyone! I've been a little slack lately, there's been a bit much happening on the home front for too much crafty time!
The weather up here in Townsville is lovely, Gina, I think we got up to around 26 today :D
Irina - if you can't get a border punch, try the decorative edged scissors, they look nice too. Even pinking shears add a nice bit of interest!
Thanks for dropping by, hopefully I'll be back to more regular posts soon. Not tomorrow though, It's my birthday! :D
Hi Rita, hope you had a lovely birthday! My birthday is also in July, it's a nice month for birthdays! I though about the decorative edged scissors, that will work in the meantime( but I have been eyeing some Martha Stewart border punches). Here are a couple of web sites I thought you might find interesting:
http://aspoonfullofsugarchallenge.blogspot.com/...oh, can't remeber the other one, sorry
Here is the other one
http://thecraftynomad.blogspot.com/
I had just seen these paper rosettes somewhere else and was wondering how on earth to do it! And voila!!!! Thank you so much! I always make cards for all occasions, but have been getting a bit boring with them, so these will jazz things up nicely.
I am thinking a night of doing and stock piling for the next time I am "carding". Thanks again - I am a new member and will follow with great interest.
How long is the sheet of paper to start with??
Hi Mindy,
Sorry it's taken me six months to reply! The strip is 12 inches long to start with.
Post a Comment