First of all, you'll need a small square card base. Mine was about 10.5cm x 10.5cm. (So I cut a strip 10.5x21cm)
Then take your patterned base, the papers I used here are from the Kaisercraft Chanteuse collection 6x6" paper pad. Trim out two squares, both 10x10cm.
The next step is optional, but I think it adds a little bit of texture. Cut a piece of ribbon, about 45-50cm long, and stick it to the card base. I find it's easier to fold the card, and then place a small strip of tape under where the patterned paper will go, avoiding putting tape over the folded edge, then repeating for the other side.
Stick down your patterned paper.
You could handcut rough circles too, if you don't have a die cutter.
Put a bit of ink on the edges of each circle, and then all the way around the circle, snip in a short way. Don't go all the way to the centre, or it'll fall apart :) curl each "petal" slightly between your fingers.
Once this was done, I decided to glimmmermist my flowers to make them sparkle a little. While I was waiting for that to dry, I adhered a little bumblebee sticker from SRM stickers to a scrap of the orange cardstock, and poked a small hole in one corner. I tied a knot in the end of some kitchen string (I'm holding out for some pretty twine!!!), and threaded it through the hole to secure it, leaving the knot on the top side.
I also rummaged around in my button stash, and found a little beauty. I used a stanley knife to chop the shank off it, being careful not to take a finger with it. You could use a brad, but I only had pink ones... and that wouldn't look good!
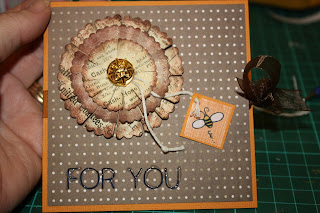
To assemble the flower, I dabbed a dot of glossy accents (the glue that I had closest! hah! I'm very lazy!) in the centre of the largest flower, and then stuck the next one on top, then again for the smallest one. I laid the string in a loop in the centre of the top flower, and added a good dab of glossy accents to secure both the string and the button, leaving the little bee tag swinging free.
To finish, I chose to use a rub on sentiment, which I went over with a bit of glossy accents to make it stand out a bit more. (It was still wet when I took the photo - it'll dry clear and hard like a resin sticker).
Isn't it sweet?
x Rita


No comments:
Post a Comment